Pong Sliders

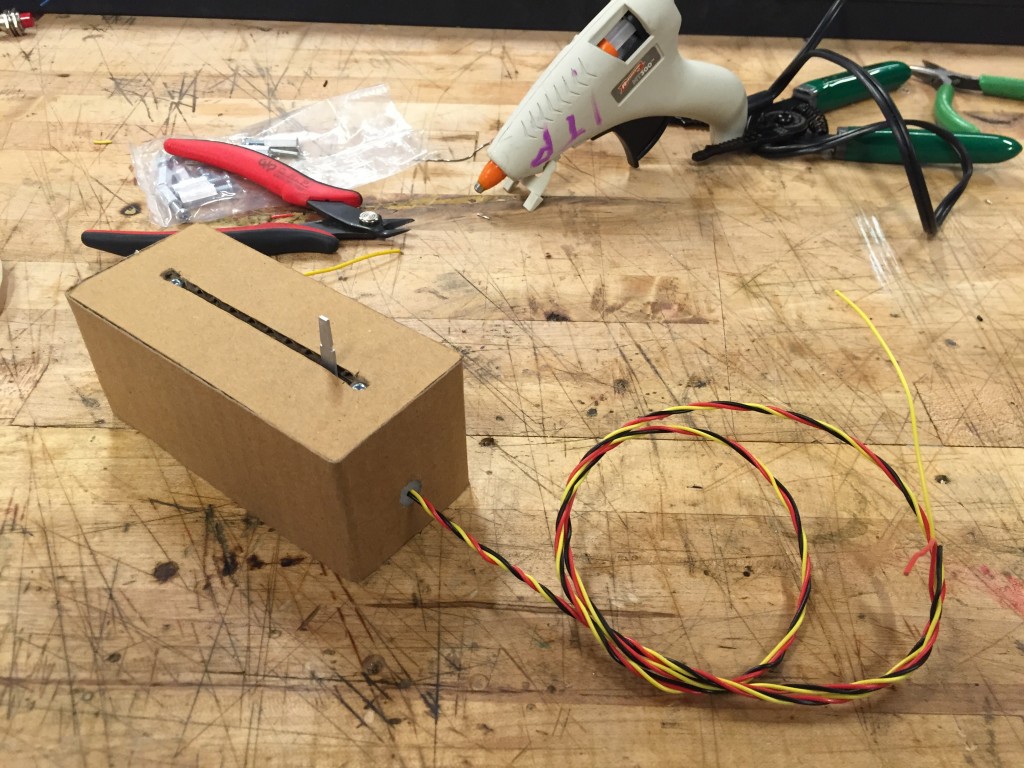
IMG_3078
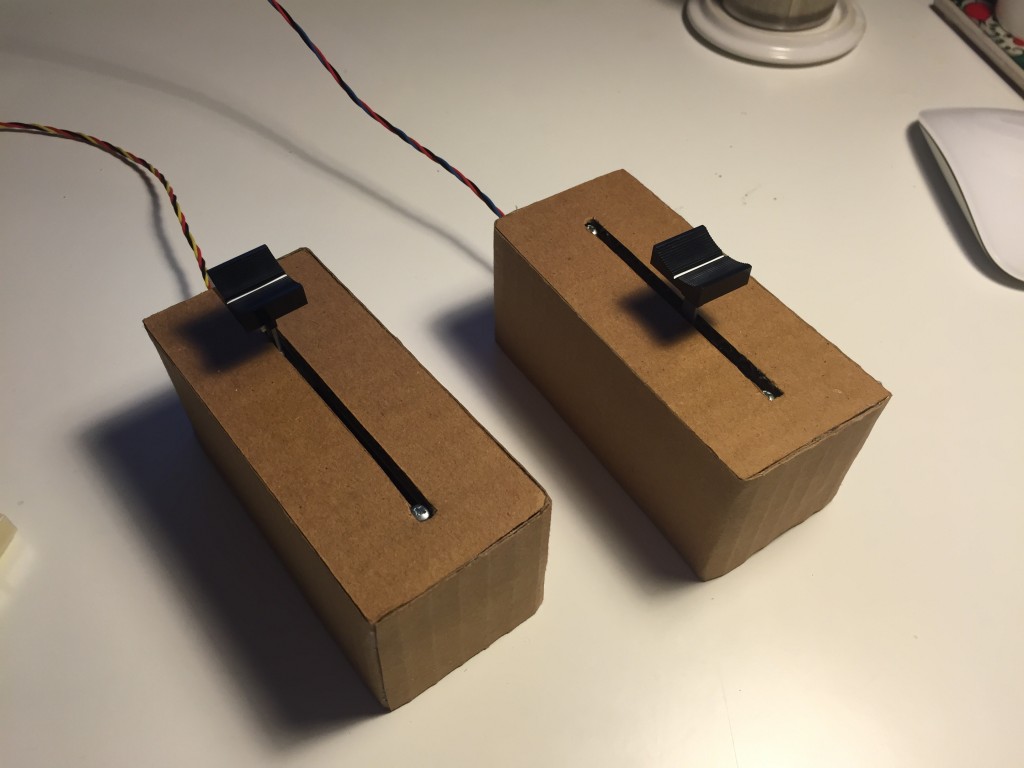
Slide controls for pong.

I wanted to make some controllers for the pong game I’ve been plugging away at for ICM. Constructing the prototypes was pretty straight forward, but getting the code to work has been a whole other thing.

I had some slide pots already from a previous project, so all I really needed to do was make a housing for them. Cardboard is free, and I actually quite like it as a material.

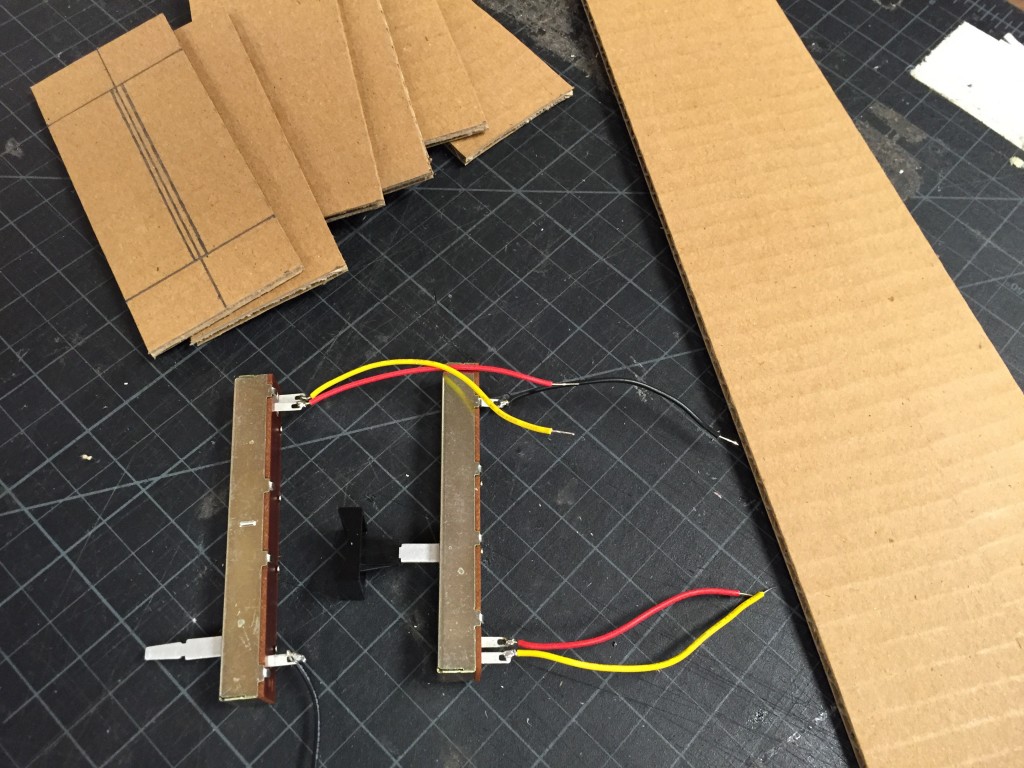
IMG_3061
Slide pots and cut cardboard.
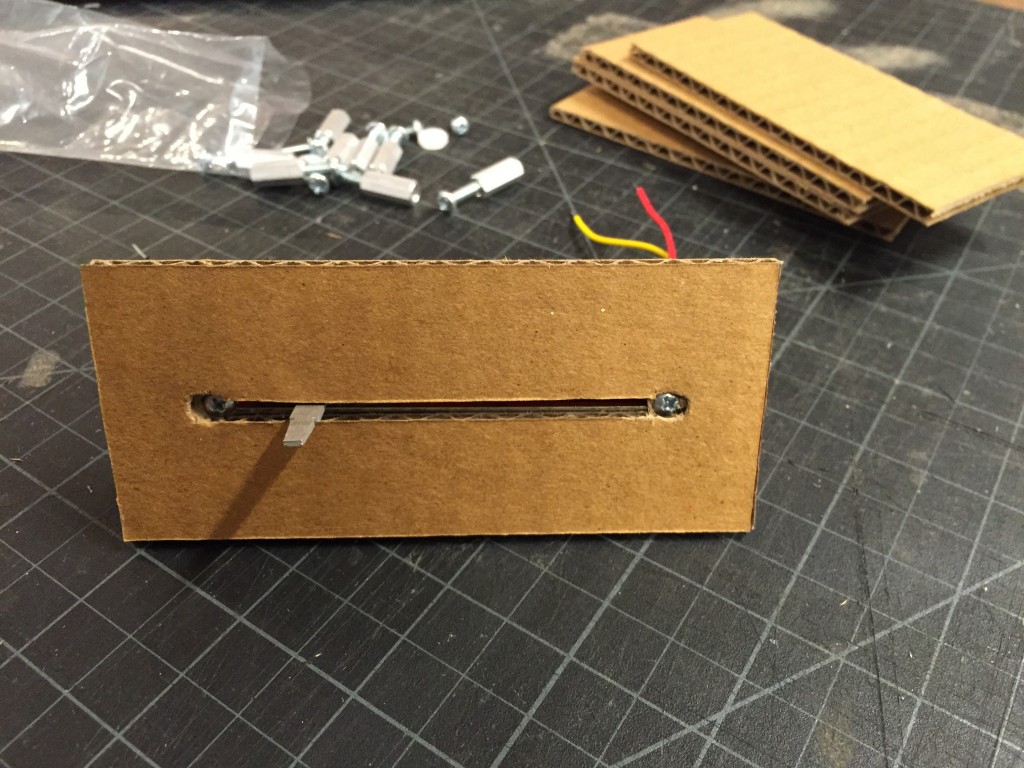
IMG_3062
Pot screwed into the top of the housing.
This way there will be no visible corrugated edges.
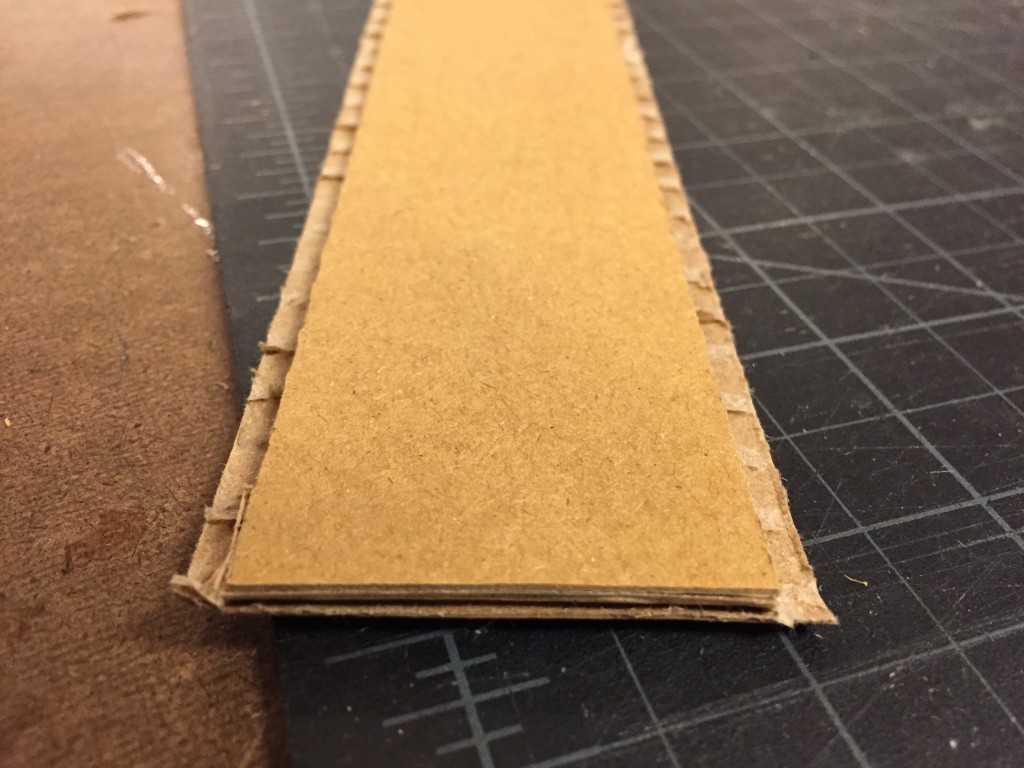
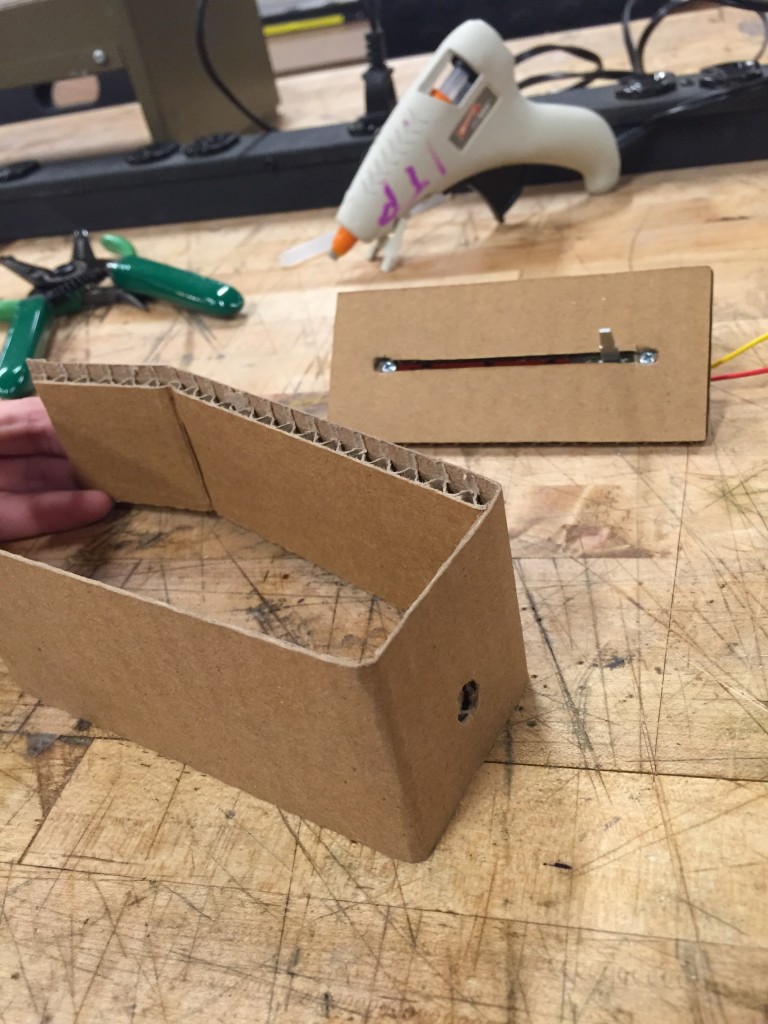
The sides of the housing are all out of one long piece of cardboard
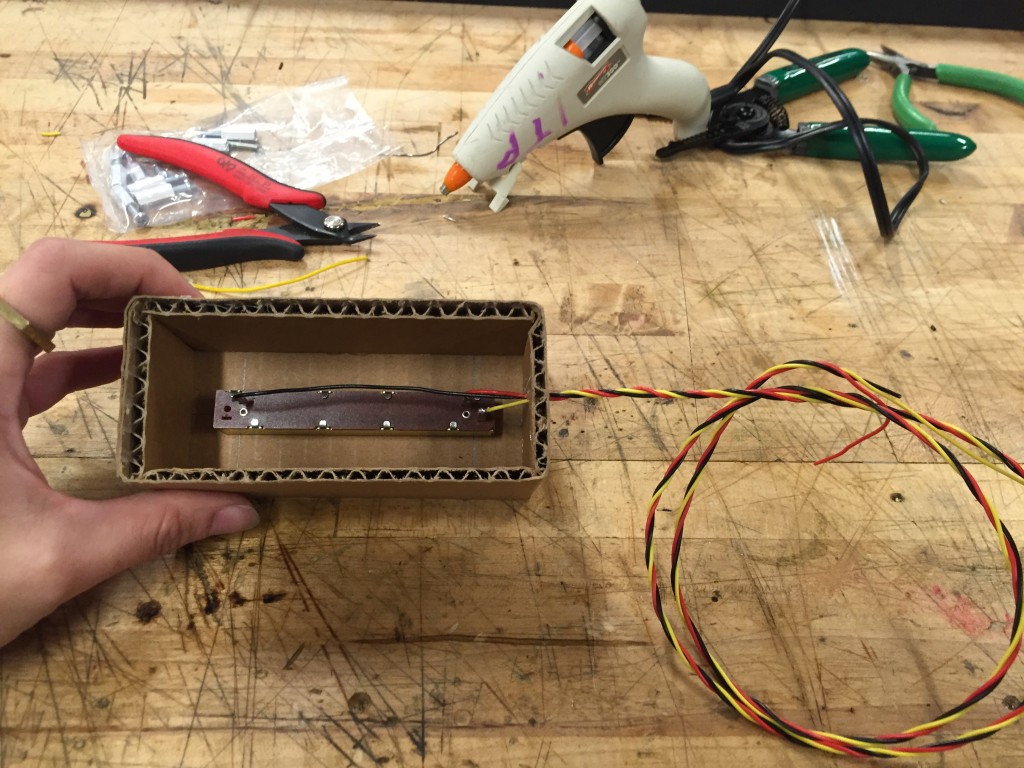
The top is hot glued to the sides. The wires are threaded through a plastic nut. This gives a nice finish and stops the soldering from getting broken if the wires are pulled on.
The view from the bottom.
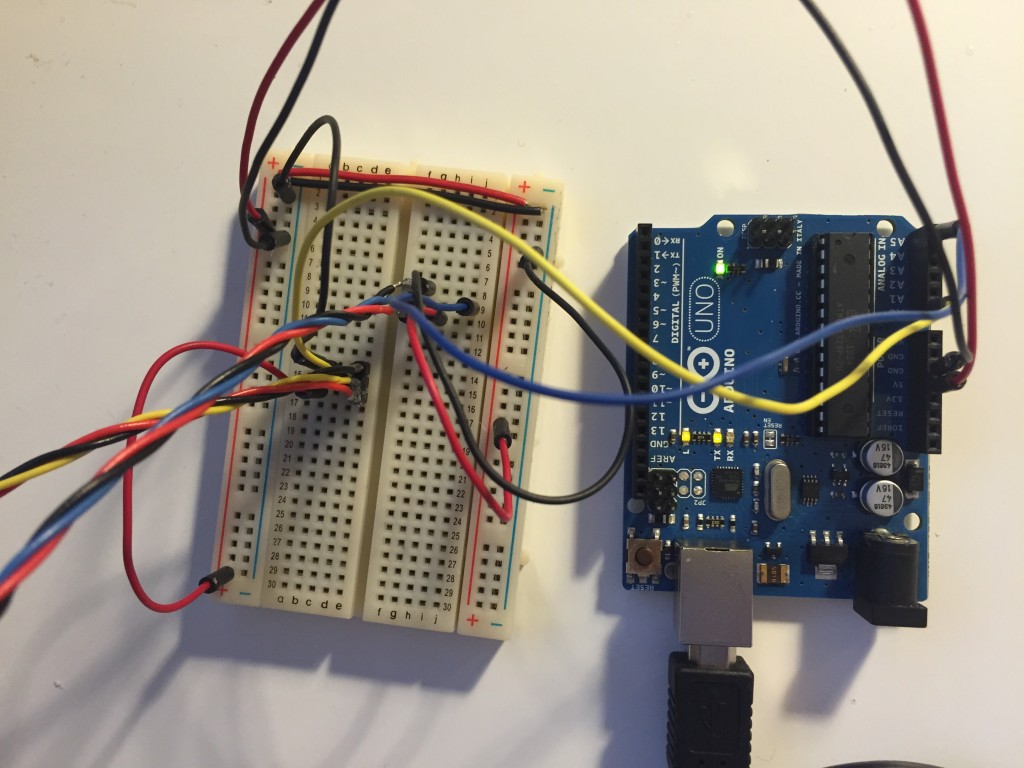
The wiring.
The wiring.

The Arduino code seems to work just fine:

void setup() {
  Serial.begin(9600);

}

void loop() {
//send two things separated by a commma

 int slideOne = analogRead(A0);                  // read the input pin
 int mappedSlideOne = map(slideOne, 0, 1023, 0, 255); // remap the pot value to fit in 1 byte
 int slideTwo = analogRead(A5);                  // read the input pin
 int mappedSlideTwo = map(slideTwo, 0, 1023, 0, 255); // remap the pot value to fit in 1 byte
 Serial.print(mappedSlideOne);                             // print it out the serial port
 Serial.print(",");
 Serial.println(mappedSlideTwo);
 delay(1);
}

But the p5.js code keeps coming up ‘undefined’. I can’t figure out what’s wrong with the code. After I’ve gotten that worked out it should be pretty easy to drop it into the pong code I’ve already been working on.

var serial; // variable to hold an instance of the serialport library
var portName = '/dev/cu.usbmodem1421'; // fill in your serial port name here
var inData; // for incoming serial data
var myData;
var input;
var input2;
var inString;


function setup() {
  serial = new p5.SerialPort(); // make a new instance of the serialport library
  serial.on('list', printList); // set a callback function for the serialport list event
  serial.on('connected', serverConnected); // callback for connecting to the server
  serial.on('open', portOpen); // callback for the port opening
  serial.on('data', serialEvent); // callback for when new data arrives
  serial.on('error', serialError); // callback for errors
  serial.on('close', portClose); // callback for the port closing
  serial.open(portName); // open a serial port

  serial.list(); // list the serial ports
  createCanvas(400, 300);
}


function draw() {
  background(0);
  fill(255);
  //text("sensor value: " + input + "," + input2, 30, 30);
  text("sensor value: " + input, 30, 30);
  text("hello world", 30, 50);
  print(inString);
}
 

function serverConnected() {
  println('connected to server.');
}

function portOpen() {
  println('the serial port opened.');
}

function serialEvent() {
  inString = serial.readStringUntil('\r\n');

  if (inString.length > 0) {
    var parts = inString.split(","); //split the incoming into an array based on the comma
    input = int(parts[0]);
    input2 = int(parts[1]);
    print(input2 + "Got data" + input);
  }

}

function serialError(err) {
  println('Something went wrong with the serial port. ' + err);
}

function portClose() {
  println('The serial port closed.');
}


// get the list of ports:
function printList(portList) {
  // portList is an array of serial port names
  for (var i = 0; i < portList.length; i++) {
    // Display the list the console:
    println(i + " " + portList[i]);
  }
}


Bouncing Ball Array

http://itp.jscottdutcher.com/ball_array/

I wanted to make a whole bunch of bouncing balls, so that eventually I can add them back into the pong game. I ran into a couple of problems

Too many circles:

I banged my head against this one for a while, until I remembered that we actually did a bouncing ball example in class. I pulled up that code and compared it to mine. Turns out I was creating circles in draw as well as setup, so I was getting way more circles than I wanted. I removed that line of code and everything was good

Balls disappear:

I added some acceleration to the balls, so after they hit the ‘walls’ they would go faster. After I did this the balls would eventually disappear. Maybe they were going faster than the frame rate?


Stuff that would be cool to add to bouncing balls:

  • Balls bounce off each other.
  • Balls are added every second, rather than all at once.


Working with Jesse’s code. 

http://itp.jscottdutcher.com/bouncing_peeps/

Jesse sent me the code for his evil peeps, so I added my bouncing and moving code to the peeps. I’m sure that there’s a lot in the code that doesn’t need to be, since my method was basically to paste in his code and then delete things until it worked correctly. That basically worked.


My bouncing ball code:

var circles = [];
//var circle;

function setup() {
  createCanvas(1000, 700);

  for (var i = 0; i <= 100; i++) {
    circles[i] = new Ball();

    //circles[i].move();
    //circles[i].display();
  }


}

function draw() {
  background(64, 161, 76);

  //if (millis() < 5000){
  fill(198, 237, 44);
  for (var i = 0; i <= 100; i++) {
    //circles[i] = new Ball();
    circles[i].move();
    circles[i].display();
    circles[i].bounce();
    print("check");
    print(circles.length);
    //}

  }


  /*for (var i = 0; i < 100; i++) { circles[i].move(); circles[i].display(); }*/ } function Ball() { this.xpos = random(width); this.ypos = random(height); this.xdir = random (-5, 5); this.ydir = random (-5, 5); this.display = function() { noStroke(); ellipse(this.xpos, this.ypos, 20, 20); } this.move = function() { this.xpos = this.xpos + this.xdir; this.ypos = this.ypos + this.ydir; } this.bounce = function() { if (this.xpos >= width || this.xpos <= 0) { this.xdir = this.xdir * -1 } if (this.ypos >= height || this.ypos <= 0) {
      this.ydir = this.ydir * -1
    }
}
}

Movie Theater Ticket Kiosk

Ticket Kiosks

These automatic kiosks are everywhere now. These machines are only minimally interactive, but I think they are especially interesting. I do not like using them, but I like it more than actually going up to the ticket window and talking to an actual person to buy my ticket. That dynamic seems off-putting and strange.  This particular batch is from the Regal Cinema in Union Square. People can use them to buy tickets for movies, or pick up tickets that they have already bought online.

Most people coming into the theater seem to gravitate towards the automatic kiosks. I didn’t actually take notes on the numbers, but it seemed true. There are enough kiosks that no one has to wait to buy a ticket, even when there is a large crowd and several kiosks are out of order.

I timed 20 transactions from first screen tap to picking up printed tickets.

0:59.19
0:46.23
1:06.35
0:50.79
0:47.32
01:36.76
0:15.54
1:25.37
0:56.24
0:50.55
2:04.54
1:36.12
2:22.20
3:29.77
0:38.26
1:00.36
0:58.21
1:02.47
0:04.95
1:03.81
Avg 1:11.75

I was surprised that the average time was around a minute, it seemed so much longer than that. Most of the time seemed to be spent tapping through informational interfaces, and the most common problem seemed to be with the credit card readers.

The whole time I was there I expected at least one user to get really angrily frustrated with the process, but no one did. Even the people who had trouble seemed to take it all in stride. They tried different credit cards without prompting from the machine and solved their own problems. It seems like at this point everyone has a pretty good mental model for how these things work. Also, I wonder if everyone has very low expectations for how the machines will work so event the fact that it works at all is a success.

Even after observing folks buying tickets I’m left wondering why everyone prefers this over talking with a person. Quicker process? Aversion to talking with others? I guess that one needs more research.

Infinite Pong, again

http://itp.jscottdutcher.com/pong4/

This week, much like last week, was an exercise in not getting as much done as I would have liked. Adding functions to my previous code was a breeze, until I ran it and kept getting an uncaught reference error. It took me ages to figure out where I was missing a curly bracket and I felt like a right fool the whole time I was looking. Oh well! It remains remarkably satisfying when your code works, even when all it is is a meager refactor.

ar gameStart = false;
var paddleL = {
  x: 10,
  y: 100,
  w: 15,
  h: 100,
};
var paddleR = {
  x: 770,
  y: 100,
  w: 15,
  h: 100,
};
var ball = {
  x: 50,
  y: 20,
  diam: 25,
  speedX: 5,
  speedY: 5,
};
var speedX = 5;
var speedY = 5;
var paddleSpeed = 12;
var s = "Welcome to Infinte Pong! Player one controlls their paddle with the a and z keys. Player two controls their paddle with the /? key and the '\" key. Press the space bar to begin";

/*function down(x){
 x = x + 5;
}*/


function setup() {
  createCanvas(800, 600);
  smooth();
  //background(0);
  //fill(255)
  //text(s, 10, 10, 70, 80);
}

function draw() {

  //if (keyPressed(32) === true) {
  gameStart === true;
  //}
  
    background(64, 161, 76);
    noStroke();

  createLeftPaddle();
  createRightPaddle();
  createBall();
  ballBounceTopAndBottom();
  ballBounceRight();
  ballBounceLeft();


}
  function createBall() {
    //Create ball
    fill(198, 237, 44);
    ellipse(ball.x, ball.y, ball.diam, ball.diam);

    ball.x = ball.x + speedX;
    ball.y = ball.y + speedY;
  }


  function createLeftPaddle() {
    //Create the left paddle
    fill(0, 50, 50);
    rect(paddleL.x, paddleL.y, paddleL.w, paddleL.h);
    //Control the left paddle
    if (keyIsDown(90) === true) {
      if (paddleL.y + paddleL.h < height - 5) { paddleL.y = paddleL.y + paddleSpeed; } } if (keyIsDown(65) === true) { if (paddleL.y > 5) {
        paddleL.y = paddleL.y - paddleSpeed;
      }
    }
  }

  function createRightPaddle() {
    //Create the right paddle
    fill(50, 50, 0);
    rect(paddleR.x, paddleR.y, paddleR.w, paddleR.h);
    //Control the right paddle

    if (keyIsDown(191) === true) { //move paddle down
      if (paddleR.y + paddleR.h < height - 5) { paddleR.y = paddleR.y + paddleSpeed; } } if (keyIsDown(222) === true) { //move paddle up if (paddleR.y > 5) {
        paddleR.y = paddleR.y - paddleSpeed;
      }
    }

  }

  function ballBounceTopAndBottom() {

    //If if the ball hits the top or bottom of the court it bounces
    if (ball.y + 12.5 > height || ball.y < 12.5 && ball.x > 0 && ball.x < width && ball.y > 0 && ball.y < height) { speedY = speedY * -1; //reverse the direction of the motion ball.y = ball.y + speedY; //keeps things moving print("wham"); } } function ballBounceRight() { //if the x of the edge ball is more than the x of the right paddle and //the y of the ball is greater than the y of the rectangle and //less than the y of the rectangle plus the height if (ball.x + 12.5 > paddleR.x && ball.y + 12.5 > paddleR.y && ball.y + 12.5 < paddleR.y + paddleR.h && ball.x > 0 && ball.x < width && ball.y > 0 && ball.y < height) { speedX = speedX * -1; //This reverses the direction, I think ball.x = ball.x + speedX; //This keeps the ball moving print("bam"); } //if the edge of the ball is lower than rect y and //the x of the ball is greater than the x of the rect and less than the width else if (ball.y + 12.5 > paddleR.y && ball.y < paddleR.y + paddleR.y + paddleR.h && ball.x + 12.5 > paddleR.x && ball.x < paddleR.x + paddleR.x && ball.x > 0 && ball.x < width && ball.y > 0 && ball.y < height) {
      speedY = speedY * -1; //reverse the direction of the motion
      ball.y = ball.y + speedY; //keeps things moving
      print("bam top");
    }

    //if the edge of the ball is higher than rect y plus height and 
    //the x of the ball is greater than the x of the rect and less than the width
    else if (ball.y + 12.5 < paddleR.y + paddleR.h && ball.y > paddleR.y && ball.x > paddleR.x && ball.x < paddleR.x + paddleR.h && ball.x > 0 && ball.x < width && ball.y > 0 && ball.y < height) {
      speedY = speedY * -1; //reverse the direction of the motion
      ball.y = ball.y + speedY; //keeps things moving
      print("bam bottom");
    }
  }

function ballBounceLeft() {
    //if the ball hits the left wall
    /* if (ball.x < 0) {
       speedX = speedX * -1; //This reverses the direction, I think
       ball.x = ball.x + speedX; //This keeps the ball moving
       print("pow");*/

    //if the ball hits the front of the left paddle
    if (ball.x - 12.5 < paddleL.x + paddleL.w && ball.y + 12.5 > paddleL.y && ball.y + 12.5 < paddleL.y + paddleL.h && ball.x > 0 && ball.x < width && ball.y > 0 && ball.y < height) {
      speedX = speedX * -1; //This reverses the direction, I think
      ball.x = ball.x + speedX; //This keeps the ball moving
      print("pow");
    }
  }

Infinite Pong


http://itp.jscottdutcher.com/pong3/

This was a frustrating project. I wanted to accomplish more with it than I did, and I know that they are things I can do but I eventually just ran out of time. A lot of that is leaving things to the last minute, which stops me from being able to get the project help that I need. I guess that’s something to be mindful of for the future.

Anyway, I guess this is something of a v1 of this project that I will continue to update.

I started out by looking at someone else’s pong game. I found a simple version written in processing here. I adapted that code for p5 and picked it apart until I understood what all the pieces did:

//original code borrowed from: http://www.openprocessing.org/sketch/47481

var gameStart = false;
var x = 150; //This is the x where the ball starts
var y = 150; //This is the y where the ball starts
var speedX = 5; //This is the speed of the ball's x coordinate
var speedY = 5; //This is the speed of the ball's y coordinate
var leftColor = 200; //This is the color of the left bar
var rightColor = 128; //This is the color of the right bar
var diam = 20; //This is the diameter of the ball
var rectSize = 150; //This is the size of the right paddle NOTE: When it resets the paddle gets bigger

function setup() {
  createCanvas(500, 500);
  noStroke();
  smooth();
}

function draw() {
  background(255);

  fill(128, 128, 128);
  ellipse(x, y, diam, diam);

  fill(leftColor);
  rect(0, 0, 20, 500); //This is the size of the left rectangle, but it is just for show
  fill(rightColor);
  rect(width - 30, mouseY - rectSize / 2, 10, rectSize); //This is the size of the right paddle and how it moves

  if (gameStart === true) {

    x = x + speedX;//This is the ball movement
    y = y + speedY;//This is also the ball movement. Why do we consider these separately?
  }

  // if ball hits left paddle, invert X direction and apply effects
  if (x > width - 30 && x < width - 20 && y > mouseY - rectSize / 2 && y < mouseY + rectSize / 2) 
  /*
  If x is greater than the width of the canvas - 30 and x is less than the width of the canvas - 20
  NOTE: I don't understand what the above does it seems to affect the size of the left paddle,
  but I don't know why
  and y is greater than the top of the rectange and the bottom of the rectangle then:
  */
  {
    speedX = speedX * -1; //This reverses the direction, I think
    x = x + speedX; //This keeps the ball moving
    rightColor = 0; //This makes the left paddle black for a sec
    fill(random(0, 128), random(0, 128), random(0, 128));//This is the splat color
    var diamHit = random(75, 150);//This is the splat animation
    ellipse(x, y, diamHit, diamHit);//This is also the splat animation
    rectSize = rectSize - 10; //This makes the left paddle smaller
    rectSize = constrain(rectSize, 10, 150); //This keeps the left paddle from disapearing compleatly
    print("pow");
  }

  // if ball hits wall, change direction of X
  else if (x < 25) //if the ball is less than this margin on the right side then: { speedX = speedX * -1.1;//This reverses the direction and makes it faster x = x + speedX; //This keeps the ball moving print("bam"); } else { //This resets the colors of the paddles to whatever they were before the 'hit' animation leftColor = 128; rightColor = 128; } // resets things if you lose if (x > width) {
  //If x moves out of frame
    gameStart = false; //State resets
    x = 150; //The ball goes back to here
    y = 150; //and here
    speedX = random(3, 5); //speed is random again
    speedY = random(3, 5); //speed is random again
    rectSize = 150; //the size of the right paddle resets
  }


  // if ball hits up or down, change direction of Y  
  if (y > height || y < 0) 
  //If y is greater than the height of the canvas or less than 0 then:
  {
    speedY = speedY * -1; //reverse the direction of the motion
    y = y + speedY; //keeps things moving
    print("wham");
  }
}


function mousePressed() { //changes the state at the beginning when mouse is pressed
  gameStart = true;
}

After I felt like I had a handle on things I set off writing my own code. I started with using keypresses to make the paddles work, as I wanted two people to be able to play this on one machine. After that seemed to be working I added the ball logic to the game. This is where I ran into some trouble.

I think that because I am describing the edges of the paddles instead of all of them the ball is getting caught behind the paddles and sometimes comes back into the canvas.

Additional things I wanted to add:

  • Intro screen with directions and a start button.
  • Sound when the ball hit a paddle or the wall
  • More balls, like one more every 5 seconds
var gameStart = false;
var paddleL = {
  x: 10,
  y: 100,
  w: 15,
  h: 100,
};
var paddleR = {
  x: 770,
  y: 100,
  w: 15,
  h: 100,
};
var ball = {
  x: 50,
  y: 20,
  diam: 25,
  speedX: 5,
  speedY: 5,
};
var speedX = 5;
var speedY = 5;
var paddleSpeed = 12;
var s = "Welcome to Infinte Pong! Player one controlls their paddle with the a and z keys. Player two controls their paddle with the /? key and the '\" key. Press the space bar to begin";

/*function down(x){
 x = x + 5;
}*/


function setup() {
  createCanvas(800, 600);
  smooth();
  //background(0);
  //fill(255)
  //text(s, 10, 10, 70, 80);
}

function draw() {

  //if (keyPressed(32) === true) {
  //gameStart === true;
  //}

  //if (gameStart === true) {
    background(64, 161, 76);
    noStroke();

    //Create the left paddle
    fill(0, 50, 50);
    rect(paddleL.x, paddleL.y, paddleL.w, paddleL.h);
    //Control the left paddle
    if (keyIsDown(90) === true) {
      if (paddleL.y + paddleL.h < height - 5) { paddleL.y = paddleL.y + paddleSpeed; } } if (keyIsDown(65) === true) { if (paddleL.y > 5) {
        paddleL.y = paddleL.y - paddleSpeed;
      }
    }
    //Create the right paddle
    fill(50, 50, 0);
    rect(paddleR.x, paddleR.y, paddleR.w, paddleR.h);
    //Control the right paddle
    if (keyIsDown(191) === true) { //move paddle down
      if (paddleR.y + paddleR.h < height - 5) { paddleR.y = paddleR.y + paddleSpeed; } } if (keyIsDown(222) === true) { //move paddle up if (paddleR.y > 5) {
        paddleR.y = paddleR.y - paddleSpeed;
      }
    }
    //Create ball
    fill(198, 237, 44);
    ellipse(ball.x, ball.y, ball.diam, ball.diam);

    ball.x = ball.x + speedX;
    ball.y = ball.y + speedY;
    //If if the ball hits the top or bottom of the court it bounces
    if (ball.y + 12.5 > height || ball.y < 12.5 && ball.x > 0 && ball.x < width && ball.y > 0 && ball.y < height) {
      speedY = speedY * -1; //reverse the direction of the motion
      ball.y = ball.y + speedY; //keeps things moving
      print("wham");
    }

    //if the ball hits the left wall
    /* if (ball.x < 0) {
       speedX = speedX * -1; //This reverses the direction, I think
       ball.x = ball.x + speedX; //This keeps the ball moving
       print("pow");*/

    //if the ball hits the front of the left paddle
    if (ball.x - 12.5 < paddleL.x + paddleL.w && ball.y + 12.5 > paddleL.y && ball.y + 12.5 < paddleL.y + paddleL.h && ball.x > 0 && ball.x < width && ball.y > 0 && ball.y < height) { speedX = speedX * -1; //This reverses the direction, I think ball.x = ball.x + speedX; //This keeps the ball moving print("pow"); } //if the x of the edge ball is more than the x of the right paddle and //the y of the ball is greater than the y of the rectangle and //less than the y of the rectangle plus the height if (ball.x + 12.5 > paddleR.x && ball.y + 12.5 > paddleR.y && ball.y + 12.5 < paddleR.y + paddleR.h&& ball.x > 0 && ball.x < width && ball.y > 0 && ball.y < height) { speedX = speedX * -1; //This reverses the direction, I think ball.x = ball.x + speedX; //This keeps the ball moving print("bam"); } //if the edge of the ball is lower than rect y and //the x of the ball is greater than the x of the rect and less than the width else if (ball.y + 12.5 > paddleR.y && ball.y < paddleR.y + paddleR.y + paddleR.h && ball.x + 12.5 > paddleR.x && ball.x < paddleR.x + paddleR.x&& ball.x > 0 && ball.x < width && ball.y > 0 && ball.y < height) {
      speedY = speedY * -1; //reverse the direction of the motion
      ball.y = ball.y + speedY; //keeps things moving
      print("bam top");
    }

    //if the edge of the ball is higher than rect y plus height and 
    //the x of the ball is greater than the x of the rect and less than the width
    else if (ball.y + 12.5 < paddleR.y + paddleR.h && ball.y > paddleR.y && ball.x > paddleR.x && ball.x < paddleR.x + paddleR.h && ball.x > 0 && ball.x < width && ball.y > 0 && ball.y < height) {
      speedY = speedY * -1; //reverse the direction of the motion
      ball.y = ball.y + speedY; //keeps things moving
      print("bam bottom");
    }
  //}
}
RGB Pencil


This project uses the resistance in a graphite pencil to change the colors of an RGB LED. I built the two parts separately to make sure they worked before combining them.


I used the directions and some example code, included at the bottom of the page, to make the RGB LED work. Getting this up and running was pretty easy.

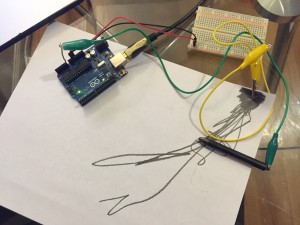
Hooking up the pencil was fun, I created a simple circuit and tested it by writing to serial.

Then I put the two together to get this:

int pencilResistance;


int RED_PIN = 9; //set pins for LEDs
int GREEN_PIN = 10;
int BLUE_PIN = 11;


void setup() {
  Serial.begin(9600); //typical speed for communication
  pinMode(0, INPUT); 
  pinMode(RED_PIN, OUTPUT);
  pinMode(GREEN_PIN, OUTPUT);
  pinMode(BLUE_PIN, OUTPUT);

}


void loop() {
  pencilResistance = analogRead(0);
  //Serial.println(pencilResistance);

  int pencilRGB = map(pencilResistance, 0, 1023, 0, 767);
  Serial.println(pencilRGB);
  
  showRGB(pencilRGB);

  
}


void showRGB(int color)
{
  int redIntensity;
  int greenIntensity;
  int blueIntensity;

  if (color <= 255)          // zone 1
  {
    redIntensity = 255 - color;    // red goes from on to off
    greenIntensity = color;        // green goes from off to on
    blueIntensity = 0;             // blue is always off
  }
  else if (color <= 511) // zone 2 { redIntensity = 0; // red is always off greenIntensity = 255 - (color - 256); // green on to off blueIntensity = (color - 256); // blue off to on } else // color >= 512       // zone 3
  {
    redIntensity = (color - 512);         // red off to on
    greenIntensity = 0;                   // green is always off
    blueIntensity = 255 - (color - 512);  // blue on to off
  }

  // Now that the brightness values have been set, command the LED
  // to those values

  analogWrite(RED_PIN, redIntensity);
  analogWrite(BLUE_PIN, blueIntensity);
  analogWrite(GREEN_PIN, greenIntensity);
}

That’s it!

There’s quite a bit more to the example code Sparkfun provided, but I didn’t need all of it:

const int RED_PIN = 9; //set pins for LEDs
const int GREEN_PIN = 10;
const int BLUE_PIN = 11;

int DISPLAY_TIME = 100;  // In milliseconds for the set colors

void setup()
{
  // Here we'll configure the Arduino pins we're using to
  // drive the LED to be outputs:
  Serial.begin(9600); //typical speed for communication
  pinMode(0, INPUT); 
  pinMode(RED_PIN, OUTPUT);
  pinMode(GREEN_PIN, OUTPUT);
  pinMode(BLUE_PIN, OUTPUT);
}


void loop()
{

  mainColors();
  

  showSpectrum();
}


// Here's the mainColors() function we've written.

// This function displays the eight "main" colors that the RGB LED
// can produce. If you'd like to use one of these colors in your 
// own sketch, you cancopy and paste that section into your code.

void mainColors()
{
  // Off (all LEDs off):

  digitalWrite(RED_PIN, LOW);
  digitalWrite(GREEN_PIN, LOW);
  digitalWrite(BLUE_PIN, LOW);

  delay(1000);

  // Red (turn just the red LED on):

  digitalWrite(RED_PIN, HIGH);
  digitalWrite(GREEN_PIN, LOW);
  digitalWrite(BLUE_PIN, LOW);

  delay(1000);

  // Green (turn just the green LED on):

  digitalWrite(RED_PIN, LOW);
  digitalWrite(GREEN_PIN, HIGH);
  digitalWrite(BLUE_PIN, LOW);

  delay(1000);

  // Blue (turn just the blue LED on):

  digitalWrite(RED_PIN, LOW);
  digitalWrite(GREEN_PIN, LOW);
  digitalWrite(BLUE_PIN, HIGH);

  delay(1000);

  // Yellow (turn red and green on):

  digitalWrite(RED_PIN, HIGH);
  digitalWrite(GREEN_PIN, HIGH);
  digitalWrite(BLUE_PIN, LOW);

  delay(1000);

  // Cyan (turn green and blue on):

  digitalWrite(RED_PIN, LOW);
  digitalWrite(GREEN_PIN, HIGH);
  digitalWrite(BLUE_PIN, HIGH);

  delay(1000);

  // Purple (turn red and blue on):

  digitalWrite(RED_PIN, HIGH);
  digitalWrite(GREEN_PIN, LOW);
  digitalWrite(BLUE_PIN, HIGH);

  delay(1000);

  // White (turn all the LEDs on):

  digitalWrite(RED_PIN, HIGH);
  digitalWrite(GREEN_PIN, HIGH);
  digitalWrite(BLUE_PIN, HIGH);

  delay(1000);
}


// Below are two more functions we've written,
// showSpectrum() and showRGB().

// showRGB() displays a single color on the RGB LED.
// You call showRGB() with the number of a color you want
// to display.

// showSpectrum() steps through all the colors of the RGB LED,
// displaying a rainbow. showSpectrum() actually calls showRGB()
// over and over to do this.

// We'll often break tasks down into individual functions like
// this, which makes your sketches easier to follow, and once
// you have a handy function, you can reuse it in your other
// programs.


// showSpectrum()

// This function steps through all the colors of the RGB LED.
// It does this by stepping a variable from 0 to 768 (the total
// number of colors), and repeatedly calling showRGB() to display
// the individual colors.

// In this function, we're using a "for() loop" to step a variable
// from one value to another, and perform a set of instructions
// for each step. For() loops are a very handy way to get numbers
// to count up or down.

// Every for() loop has three statements separated by semicolons:

//   1. Something to do before starting

//   2. A test to perform; as long as it's true,
//      it will keep looping

//   3. Something to do after each loop (usually
//      increase a variable)

// For the for() loop below, these are the three statements:

//   1. x = 0;     Before starting, make x = 0.

//   2. x < 768;   While x is less than 768, run the
//                 following code.

//   3. x++        Putting "++" after a variable means
//                 "add one to it". (You can also use "x = x + 1")

// Every time you go through the loop, the statements following
// the loop (those within the brackets) will run.

// And when the test in statement 2 is finally false, the sketch
// will continue.


void showSpectrum()
{
  int x;  // define an integer variable called "x"
  
  // Now we'll use a for() loop to make x count from 0 to 767
  // (Note that there's no semicolon after this line!
  // That's because the for() loop will repeat the next
  // "statement", which in this case is everything within
  // the following brackets {} )

  for (x = 0; x < 768; x++)

  // Each time we loop (with a new value of x), do the following:

  {
    showRGB(x);  // Call RGBspectrum() with our new x
    delay(10);   // Delay for 10 ms (1/100th of a second)
  }
}


// showRGB()

// This function translates a number between 0 and 767 into a
// specific color on the RGB LED. If you have this number count
// through the whole range (0 to 767), the LED will smoothly
// change color through the entire spectrum.

// The "base" numbers are:
// 0   = pure red
// 255 = pure green
// 511 = pure blue
// 767 = pure red (again)

// Numbers between the above colors will create blends. For
// example, 640 is midway between 512 (pure blue) and 767
// (pure red). It will give you a 50/50 mix of blue and red,
// resulting in purple.

// If you count up from 0 to 767 and pass that number to this
// function, the LED will smoothly fade between all the colors.
// (Because it starts and ends on pure red, you can start over
// at 0 without any break in the spectrum).


void showRGB(int color)
{
  int redIntensity;
  int greenIntensity;
  int blueIntensity;

  // Here we'll use an "if / else" statement to determine which
  // of the three (R,G,B) zones x falls into. Each of these zones
  // spans 255 because analogWrite() wants a number from 0 to 255.

  // In each of these zones, we'll calculate the brightness
  // for each of the red, green, and blue LEDs within the RGB LED.

  if (color <= 255)          // zone 1
  {
    redIntensity = 255 - color;    // red goes from on to off
    greenIntensity = color;        // green goes from off to on
    blueIntensity = 0;             // blue is always off
  }
  else if (color <= 511) // zone 2 { redIntensity = 0; // red is always off greenIntensity = 255 - (color - 256); // green on to off blueIntensity = (color - 256); // blue off to on } else // color >= 512       // zone 3
  {
    redIntensity = (color - 512);         // red off to on
    greenIntensity = 0;                   // green is always off
    blueIntensity = 255 - (color - 512);  // blue on to off
  }

  // Now that the brightness values have been set, command the LED
  // to those values

  analogWrite(RED_PIN, redIntensity);
  analogWrite(BLUE_PIN, blueIntensity);
  analogWrite(GREEN_PIN, greenIntensity);
}

Red_Swirl – ICM Animation

See the real thing here: itp.jscottdutcher.com/red_swirl

The documentation for this project isn’t as good as the last one at all. I got so into making the thing that I forgot to stop and document my steps. Oops!

This started out as an in class example, but I really liked it. I wanted to try and make it so the circle got bigger and smaller, and changed color as you drew with it. Getting the circle to get bigger and bigger or redder and redder wasn’t hard, but I couldn’t figure out how to get it to come back down again.

I expressed my frustration to a friend, who pointed out that my project had no sense of time (ie ‘getting bigger time’ or ‘getting smaller time’) and I could add that with simple Boolean logic. I banged my head against trying to make that work for a while and eventually got it.

One of the difficult things I couldn’t get, and still kind of don’t, is that if I had my functions inside the draw function they wouldn’t work. But if I moved them outside, it would. What’s up with that? No idea and I don’t have a record of how my code was setup before I got it working. Oh well.

Looking at what I ended up with, it occurs to me that I probably don’t need more_red() and bigger(). I can probably do the same thing with one function, more() perhaps, and simply pass in fill_red or brushWidth. I fiddled with that a bit, but couldn’t get it to work before class.

var brushWidth = 500;
var fill_red = 0;
var isGettingRedder = true;
var isGettingBigger = true;

function setup() {
createCanvas(2000, 1000);
background (0, 255, 255);
}

function more_red() {
fill_red = fill_red+1;
print(fill_red);
}

function less_red(){
fill_red = fill_red-1;
print(fill_red);
}

function bigger(){
brushWidth = brushWidth+1;
print("bigger");
}

function smaller(){
brushWidth = brushWidth-1;
print("smaller")
}

function mousePressed(){
background (0, 255, 255);
}

function draw() {
fill(fill_red, 0, 0);
ellipse(mouseX, mouseY, brushWidth, brushWidth);

if (fill_red == 255){
isGettingRedder = false;
}

if (fill_red === 0){
isGettingRedder = true;
}

if (brushWidth == 500){
isGettingBigger = false;
}

if (brushWidth === 0){
isGettingBigger = true;
}

if (isGettingRedder === true){
more_red();
}

if (isGettingRedder === false){
less_red();
}

if (isGettingBigger === true){
bigger();
}

if (isGettingBigger === false){
smaller();
}

}

Your Eyes Light Up: P Comp Switch Project

I decided to make a stuffed animal whose eyes lit up for this project. The switch would be in the animal’s hands. When you hold them together, the circuit would be complete.

IMG_3043

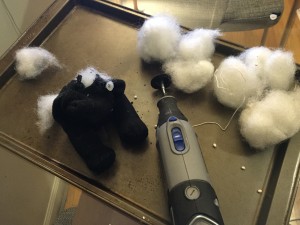
I started with a plush souvenir bear, then opened up the seam on its back and removed the stuffing and eyes. The eyes were tricky to get out and I ended up having to use a dremel to cut the fasteners inside the bear’s head.

IMG_3044

After I had enough of the stuffing out I sewed patches of conductive thread on the bear’s hands. I planned on threading the wire under the patches inside the bear. This proved hard to do later, and I should have sewn the wire in while I was sewing the patches in.

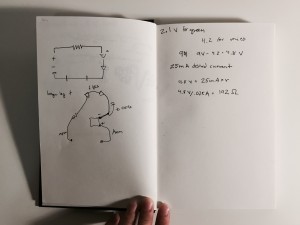
I planned on using a 9V battery to power the bear, since I already had one in my toolbox. This meant doing a little light math to see what kind of resistor I needed to use.

IMG_3047

You can also see my basic circuit diagram and how I sketched out what the wiring would be inside the bear.

IMG_3046

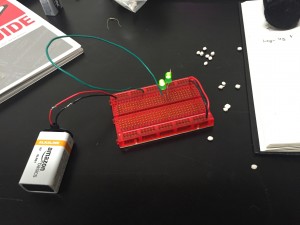
Next I built the circuit on a breadboard, to make sure everything worked the way it should. You can’t tell from the picture, but there is a 200 ohm resistor in there along with the LEDs.

Next I wired up the inside of the bear. I didn’t end up soldering the wires in place, because this version of the project it pretty  basic. I wanted to leave myself the option of cutting everything out again without ruining too much work. Instead I used ‘jeweler’s loops’ to secure the wires and then crimped the ends together. I don’t have a picture of this step because I was so happy to get everything together that I forgot to stop and snap one.

As soon as I got all the wiring done I took a quick video of the eyes lighting up. Then I stuffed the bear back up. I safety pinned the back of the bear, so I can take him apart again later if I want to.

It might be nice to get some LED holders for the eyes so they don’t stick out strangely like they do now. He could also use a nice zipper on his back instead of the pins.

Takeaways of the Week – Shoot for MVP

Use less time on grunt work. Don’t make parts you don’t have to, it’s ok to buy them. Spend some money, save some time.

Sometimes it’s ok to go with an obvious answer or an easy project for homework. Each week is not a fully realized idea in and of itself. They are doodles and sketches. It’s more important to master new tools and skills and explore quick little ideas than to polish something. Keep moving. You can always come back to something you like.

Make more doodles. If you made something for a homework assignment that came together quickly, try making something else as well. Go in a different direction from the same starting point.